Considering taking your bike with you the next time you travel? Don’t know the first thing about how to travel with your bike? That’s OK! It’s easier than you might think.
When it comes to getting your bike safely to your destination, two basic options exist:
- Ship it to your destination.
- Take it with you as checked oversize luggage.
Shipping Your Bike Prior to Your Travel Date
This is a convenient option because you don’t have to lug your bike to the airport, but the five to seven days of delivery time on both ends of the trip add up to a lot of lost riding time. If this option works for you, though, you have many choices for shipping your bike:
- ShipBikes.com or SportsExpress.com or bikeflights.com
These services are great if it is the first time you are traveling with a bike. The helpful sites walk you through every stage of shipping your bike, giving you options for each step along the way. They can even provide the necessary packaging materials.
- UPS, FedEx or DHL
This option requires a little more effort and planning since it is up to you to find adequate packaging materials before the bike can be delivered.
Checking Your Bike as Oversize Luggage
This option allows you to retain access to your steed until the day of your flight. This equates to more time in the saddle. Oversize baggage fees vary per airline, but they are often about the same or cheaper than the delivery services listed above. It’s not unusual for rates to be as little as $50 or as much as $180.
Packing and Readying Your Bike
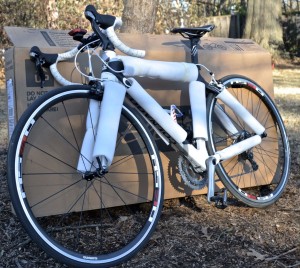
Once you’ve decided on the mode of transport, it is time to ready your bike for the journey. Regardless of the method you choose, you must pack your bicycle in a box, crate, or travel-specific case.
Backroads Pro Tip
Boxing your bike for transport is a fairly simple procedure, and it becomes even easier with practice. The more you take your steed with you, the more you’ll know about exactly how to travel with your bicycle!
If boxing your bike sounds like a lot of work, your local bike shop can usually get the job done well for about $50. If you want to try it yourself the tools and materials you will need include the following:
- Bike box and packaging material.
- Small cardboard box.
- Packaging tape.
- Bike multi-tool (for removing handlebars).
- Pedal wrench.
Once you have the proper tools and materials, the steps to prepare your bike for travel are quite simple.
- Locate a box. Many cyclists prefer to reuse a cardboard bike box from a local bike shop. It is also very handy to use a separate small cardboard box in which you can place small, loose items. This includes your computer or GPS, pedals, multi-tool, patch kit, and more.
- Wrap the frame. Your local bike shop can often give you the foam packaging material that came with the box, but in a pinch newspaper taped around the frame works as well. This protects the paint from being damaged during transit.
3. Streamline. Use a pedal wrench to remove your pedals. Place them in the small parts box.
Backroads Pro Tip
Content...When packing your pedals, don’t forget to label them “right” and “left.” This can save you a lot of trouble when reassembling the bike!
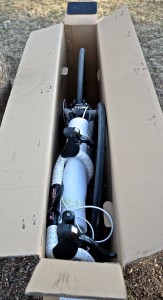
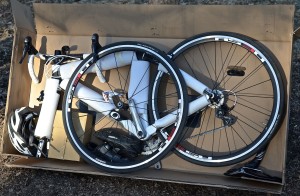
Next, remove your handlebars. If you hang them over the top tube, they’ll fit nicely into the box. Finally, remove the saddle and seat post. Tuck them in the corner of the box.
- Address the wheels. Drop your tire pressure to around 25 PSI to keep them from bursting in flight, and then remove the front wheel. Store the quick-release skewer in the small parts box. Place and secure the front wheel against the left side of the bike. Once everything is in place, check for contact between the various parts, and add padding as needed.
Backroads Pro Tip
One easy way to ensure everything is held nicely in position is to use zip ties. It’s a simple solution that really works!
- Box it up. This can be a little tricky, and it often takes some maneuvering to get the perfect fit. Depending on the style of your handlebars, you might have to experiment to find the best position. Try to find a configuration that allows the box lid to close evenly. If the brake levers seem particularly vulnerable, try rotating them to a better position or wrapping them in foam or Bubble Wrap. Tape up the small parts box, and place it in the bike box. Many cyclists also recommend adding light but bulky items (helmet, shoes, water bottles and so on) to free up suitcase space.
- Tape it up. Using packaging tape, make several passes all the way around the box. This ensures the best seal. It’s also a good idea to write your name and contact information on both sides of the box. It only takes a few seconds, but in the event the luggage gets misplaced, it can save you a lot of time and hassle.
This whole process takes a little trial and error to get just right, but eventually it becomes second nature. Some experienced cyclists can box up their steeds in less than ten minutes! Not knowing how to travel with your bike shouldn’t stop you from exploring new places on two wheels. With a little practice packing up your bike, you can experience many unique cycling cultures and learn that even a 10-mile ride can turn into an adventure when experienced behind the bars of a bicycle.


